


Cross-Platform Plugins & Widgets
Home » Documentations » Cross-Platform Plugins & Widgets » Setup & Installation
Step-by-Step Guide For You to add Travel Booking feature in any website
Explore versatile Cross-Platform Travel Widgets compatible with non-WordPress websites. Whether your site is built on Joomla, Magento, C#, Node, React, or Core PHP, this widget seamlessly integrates, offering functionality across diverse platforms and programming languages.
- Its advised to change your credentials after a certain period of time to maintain the security
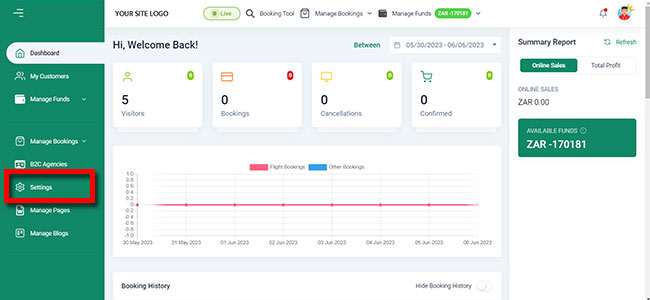
1. Login into your "glidefares Dashboard" and navigate to "Settings".
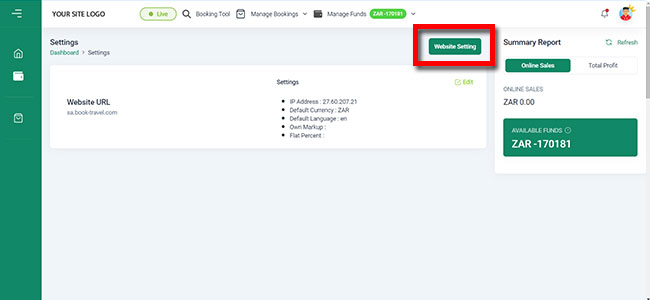
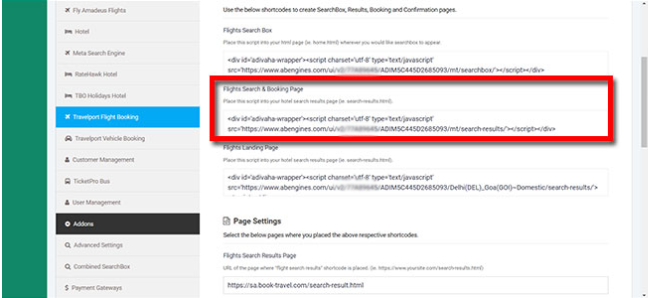
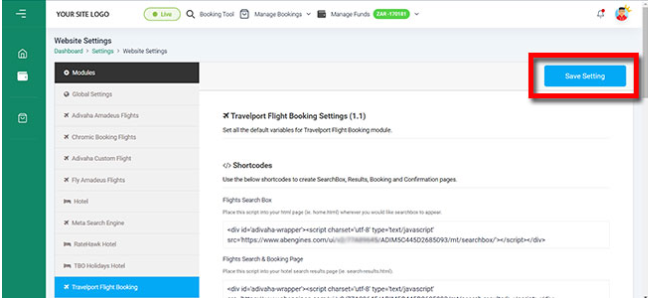
2. Then Click on" Website Settings"
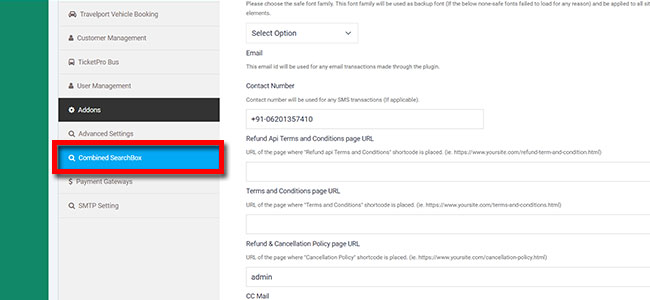
3. Then Click on "Combined Search Box"
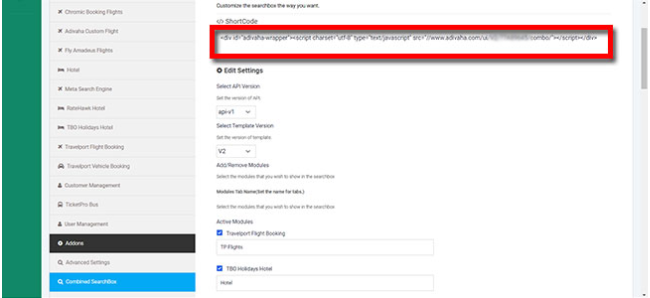
4. Copy "Shortcode For Search Box
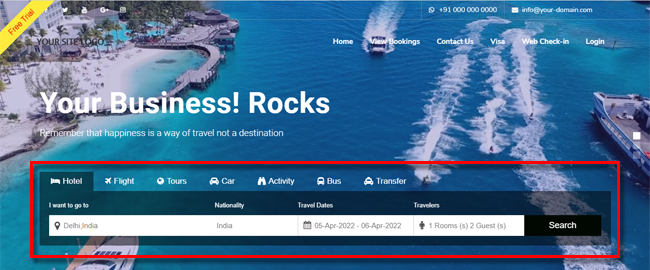
5. Paste the copied Short Code "into your home page "Search box" area and upload it to server."

6. Now refresh your home page and you should see the searchbox there.
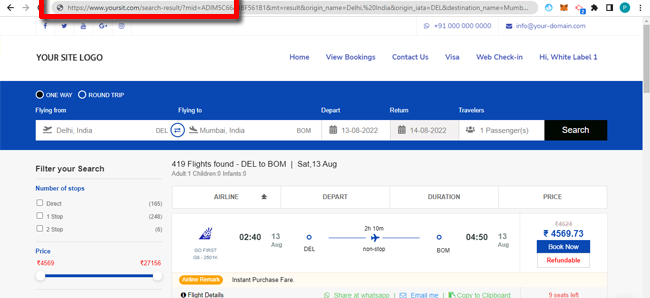
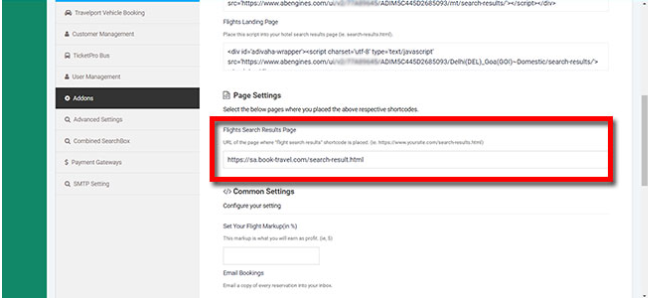
7. Create a i.e search results Page ie. https://your-site.com/search-results.html
8. Copy the search result Short Code
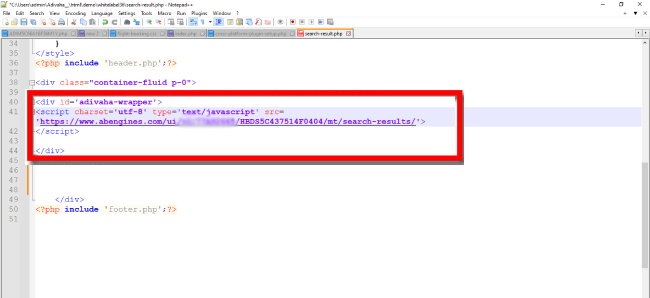
9. Paste the shortcode in your body content area of search results page (full width). ie. https://your-site.com/search-results.html
10. Feed the url of your newly created search result page (ie. https://your-site.com/search-results.html) in the settings page ("Search Result Page Url").
11. Click "Save".
Hurray! you are done! Now try searching for searvices from the home page search box.